
Introduction To Aluminum Helicopter Construction
ALUMINUM TUBE BOLT-TOGETHER CONSTRUCTION
Article Based On The Benson Gyro – Also Applicable To The AW95 Airframe
Aluminum is probably one of the easiest metals to work with since it is relatively soft being of the non-ferrous variety (not containing the harder “iron”). A lot of aluminum helicopter components can be fabricated with simple shop tools such as a hacksaw or saber saw, file, rasp, bench rill press, vice, and sander.
A bolt-together aluminum tube airframe can be fabricated and assembled with no more than the abovementioned tools. Even a Bensen style rotor head can be built almost exclusively with tools found in the average home workshop (except for the bearing block which requires some accurate machining).
Items such as gusset plates (often referred to as ‘cheek plates’ as used on open frame gyroplanes), angle and channel braces, mounting brackets, and even Bensen style seat frames can be fabricated by the average builder.
One of the simplest airframes to construct is the Bensen style gyroplane (obviously also the AW95 helicopter). It is totally bolt-together construction and utilizes mostly 2×2 inch tubing, 1/8 inch plate, and ¼ inch AN hardware. This type of construction could also apply to a fixed wing ‘trike’ ultralight aircraft or a small helicopter.
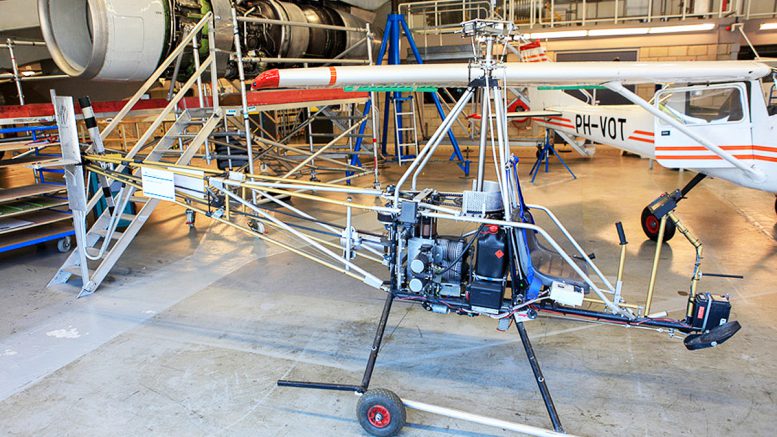
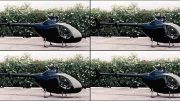
Homebuilt Helicopter – Beginning To End by Cameron Carter (New Zealand)
A fine example of an all aluminum (aluminium) helicopter. This design was initially based on the AW95 design plans built helicopter, but quickly evolved into its own design. Though of welded aluminum (aluminium) construction rather than bolt-together aluminum (aluminium), it shows what individuals can do with a little ingenuity and their own vision of what a helicopter should be.

PROCURING HELICOPTER ALUMINUM MATERIAL
If you have the abovementioned tools you could fabricate practically all of the components for a Bensen style gyro in a few weekends at a fraction of the cost of a finished kit. Most of the material can be purchased from a local metals house.
If you can’t find a local source, go online to Aircraft Spruce & Speciality or Wicks and have it delivered to your door! They handle most of the raw aluminum helicopter materials required to build a Benson style gyro and sell items in small quantities.
Most metal sales outlets will charge a cutting fee if you only need a small piece of material, so you will need to get a break if you do your own cutting. For instance, 2×2 6061T6 tubing comes in 20 ft lengths and your local metal outlet might charge $20-$40 to top it off into 5 or 6 ft. pieces.
If you buy one 20 ft stick you will have enough tubing to build a Bensen style gyro. The same goes for aluminum plate – cutting fees can get ridiculous – buy enough to make all of your gusset plates and rough-cut the individual pieces with a saber saw.
Another point to consider is that a lot of metals houses have a minimum order requirement, so you might have to buy some stock from Aircraft Spruce or Wicks unless you want to buy enough material for several ships. One way to get around the minimum order situation is to team up with other builders and buy collectively. You might even get a ‘quantity’ price break if you are buying materials for several airframes.
CUTTING ALUMINUM HELICOPTER TUBE AND ANGLE STOCK
Aluminum tubing and angle stock is easily cut with a good quality hacksaw. For best results material should be clamped in a bench vice. Use an old towel (or thick cardboard or even a homemade set of “softjaws”) in the vice jaws to protect the soft aluminum material from becoming scarred by the vice teeth – any discontinuities in aluminum such as deep scratches or gouges will weaken the material and usually result in eventual failure.
Use a metal scribe and a good combination square for marking your cutting line. Always mark two adjacent sides of tubing or angle to aid in making accurate cuts. To fabricate a professional quality component always cut slightly outside the line and file down to the scribe line, not a difficult task with aluminum. With a little care and practice you will be able to cut and file aluminum parts that look like they have been professionally workshop machined.
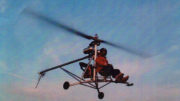
Homebuilt Helicopter – AW95 Helicopter Test Flight
CUTTING ALUMINUM PLATE
Cutting 1/8 to ¼ inch aluminum stock is a breeze with a decent, variable speed saber saw. Secure the plate to a bench with at least a couple of ‘C’ clamps. Make sure the bench top is free of metal filings or small fragments that might scar the material. In fact, it is preferable to place an old towel under the plate to provide added protection against scratches.
Use a new 14-18 point metal blade and don’t run it too fast or try to force the blade through the metal. If cutting speed is too high the aluminum will heat up and gall the teeth with molten aluminum. Use only gentle pressure against the metal and let the blade do the cutting. Too much force will also cause heat build-up which will eventually dull the teeth, result in crooked cuts, and excessive force will also break the blade.
DRILLING ALUMINUM
Drilling, like sawing should be done at slow speeds to prevent the metal from getting too hot and galling. If you have a drill press with adjustable speed, set it between 600 and 1000 RPM. A good trick to aid the drilling operation is to use a bar of soap to keep the shavings of aluminum helicopter material from sticking to the flutes of the drill bit. With the drill motor running, hold the soap bar against the side of the bit and let it partially load up with soap shavings.
A center punch or transfer punch should be used to mark the location of holes to be drilled. A transfer punch is used to make accurate hole locations from a template to a new piece of material. The template is placed over a piece of material and clamped securely in place.
A transfer punch of the exact same diameter as the template pilot hole is used to punch a drill location mark in the part to be made. Transfer punches are case hardened steel cylindrical rods with tiny, short tips which allow the punch body to accurately be located in the template hole.
For good accuracy in locating ¼ inch holes, a 1/8 inch pilot hole and transfer punch should be used. A ¼ inch pilot drill can them be used to make the final hole with good accuracy.
When drilling holes in square tubing and gusset plates the holes must be very accurately located to match up. A good practice is to drill the holes in the gusset plates and clamp the plate in place on the tubing, and then transfer the hole location to the tubing.
Never drill the tubing through a gusset plate hole of the same size as your drill bit. You will inadvertently enlarge and/or elongate the hole in the plate. It is very important that the gusset plates be very precise and that the bolt is a tight slip fit. Sloppy, elongated and oversized holes will degrade the overall structural integrity of the airframe.
A simple method for temporary assembly of aluminum helicopter airframe components to check hole and parts alignment is to drill 1/8 inch holes in all parts and use 1/8 inch Cleco fasteners on either side of the gusset plates.
A/W 95 Ultralight Helicopter Blade Straps
Insert Cleco fasteners in each hole and if you have an accurate alignment, then remove them one at a time and drill a ¼ inch hole through both the gusset plate and the tubing (on one side at a time).
Use ‘junk’ ¼ inch hardware for the trial assembly. Once the keel, mast and braces have been assembled, then remove the ‘junk’ bolts one at a time and replace them with good AN bolts.
FILING AND FINISHING
After rough cutting tubing, angle or plate material, the edges should be filed to a very smooth finish. Hold the file at approximately a 45 degree angle to the direction of motion perpendicular to the plane of the material and use forceful, forward strokes – never file back and forth.
A coarse ‘body file’ is handy for removing large amounts of material. A coarse file will be less prone to accumulating a ‘build-up’ of aluminum shavings in the grooves, finish filing with a fine, flat bastard file.
File the material down to the scribe line and make sure that all saw marks are removed. As mentioned earlier, any discontinuities will cause stress paths. After filing, the edges should be perpendicular to the plane of the material and very sharp. Any inside corners should be ‘stop drilled’ to remove stresses – outside corners should be filed to provide a radius of at least the thickness of the material.
Aluminum oxidizes very easily and it is difficult to maintain a nice, bright finish; but it can be done with the right ingredients. First, fine sand the surface with 200 – 240 grit ‘wet or dry’ paper with a ‘jitterbug’ or orbital sander. Then, finish with ‘Scotch Brite’ which is a nylon abrasive pad similar to a Brillo pad. You can find the Scotch Brite in most grocery stores.
A/W 95 Ultralight Aluminum Helicopter Rotor Hub
It is available in 3 x 5 inch pads approximately ½ inch thick, usually green in color. Use plenty of force and move the pad back and forth to give the surface a ‘brushed aluminum’ finish. Also, finish the edges in the same manner and take off the sharp edges with a Scotch Brite pad.
After the aluminum has been ‘brushed’ to your satisfaction apply a good coating of aluminum wheel polish. Again, apply with a forward motion. Now you should have a professional quality looking part.
If you do not want to put the time into the brushing, you can always have the parts powder-coated. In this case, the cleaning etc. is done for you before the part is powered coated although this does not relieve you of the job of final sanding, that must be done before you take the parts in to be powder coated.
This process is not that expensive, we paid $70 for the entire frame, cheek plates, engine mount, brake assembly etc. we chose ‘basic’ black, but a full range of colors is available at most shops for an additional fee. And it lasts, just wipe down with a damp soft cloth when needed.

Just a final note here: DO NOT ANNODIZE any criticle aluminum helicopter components as it tends to cuase them to become brittle and fail prematurely! This was once the cause of a Safari kit helicopter that went down a few years ago when the flight control rods running under the main cabin were annodized for appearance and corrosion protection with unfortunate results.


I would like to get started on my help. Can you recommend or do you offer the frame pieces including rotors, front and rear? I don’t have much money so this will be a one piece at a time thing.
Anyone out there who can help Kevin get started? We suggest you look at on line rotorcraft forums – that may help?