
Rotorway Here To Stay
ARTICLE DATE: November 2000
Once a champion, always a champion
I’VE BEEN INTERESTED in helicopters for quite some time, and I started on this process by building a radio-controlled helicopter from a kit. When I decided to build a full-size one I could fly myself, I read all the information I could find about helicopters, including NTSB accident reports involving homebuilt helicopters.
Reading between the lines, I realized that the RotorWay Exec was a safe and reliable helicopter, so I decided to find a kit and build one. After scanning every issue of Trade-a-Plane for some months, my persistence paid off. I finally saw an advertisement for a 1992 RotorWay Exec 90 and called the listed number.
An airline captain had bought this particular kit but never got around to starting the project. He said the kit was complete; nothing was missing — not even a screw — and he was willing to let it go for a fair price. I closed the deal, picked up the Exec kit and brought it home.
I wanted to know everything about my “new” RotorWay, so I spent a lot of time in my workshop reading every word in the manual over and over again and memorizing every single parts listing until I was finally convinced I was ready to start construction.
I’ve always been pretty thorough about things like that. I don’t like to take questionable shortcuts, but I’ve always been ready to take whatever steps it would take to get the exact look I desired when the project was finally finished.
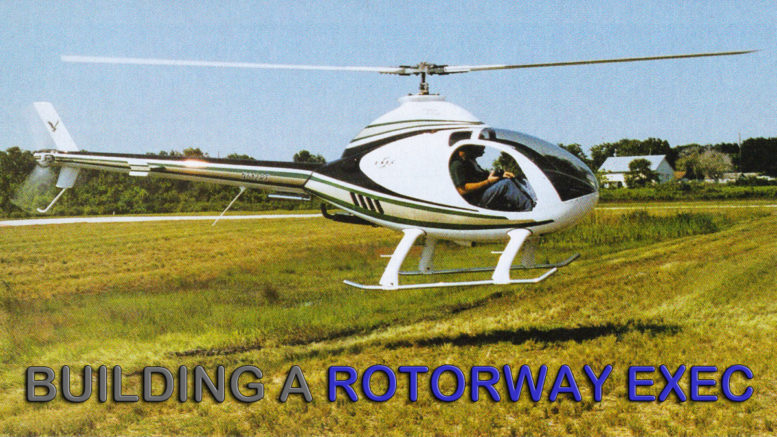
I started the project by fabricating the heat shielding out of .060 aluminum, then later had them gold-anodized. One of the locations for the heat shielding was underneath the fuel filter.
The battery is also mounted on the right side of the engine compartment (Photo 1). I then mounted an additional heat shield next to the fan shroud. Before assembling the fuselage, I painted the frame with white epoxy paint.
To contain some of the heat emanating from the muffler, I added another heat shield between the muffler and the lower fuselage skin. It’s essential to control excessive heat from certain areas of the engine.
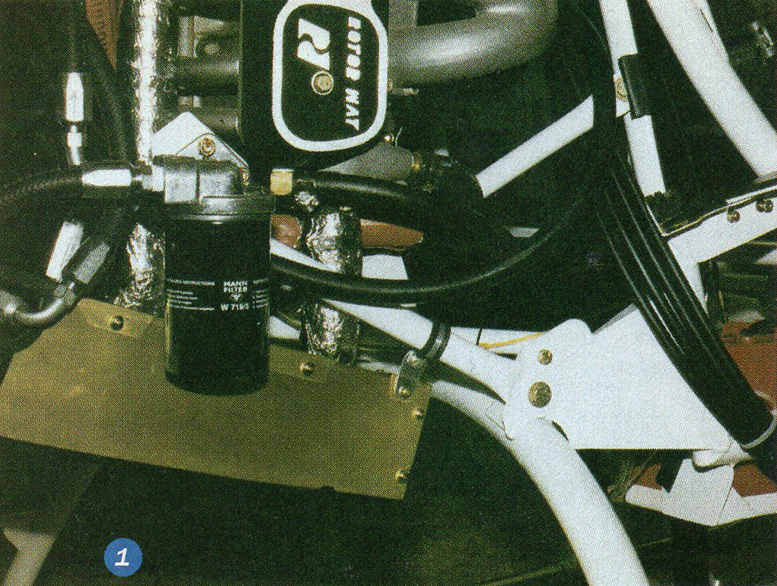
While checking the plans, I realized that there might be a problem accessing the two fuel pumps after the fiberglass body pan was installed, so I worked out a way to position an access panel that would solve the problem of reaching the fuel pumps.
To make this access panel, I cut out a section of the fiberglass shell and fabricated an aluminum mounting plate to hold the mounting hardware for attaching the panel (Photo 2).
I wanted no further problem with this panel, so I not only pop-riveted it in place, I also epoxied it onto the body shell (Photo 3). Now I could easily get at the fuel pumps for maintenance or replacement if necessary (Photo 4). Photo 5 shows how nicely the panel blends into the surrounding structure.
I wasn’t through making changes yet. I fabricated the clamps that mount the fuel tanks to the frame from 4130 steel. The rubber strips are inserted between the clamp and the frame. The mounting hardware is all AN hardware.
I finished the tank modification by increasing the length of the fuel strainer to about four inches long and installed them in the bottom of the fuel tanks. I fabricated them by silver-soldering them together.
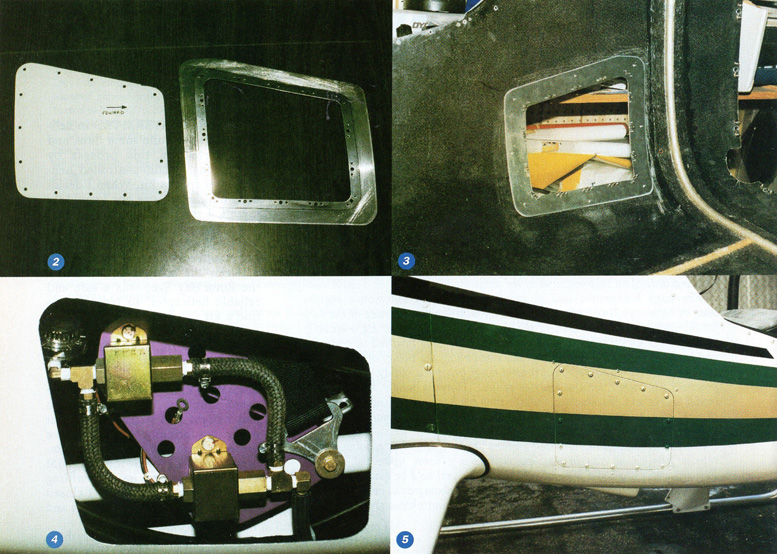
The anti-torque link was interesting to assemble. It’s mounted to the engine block and then to the frame. One of the most time-consuming operations during the building process was the fabrication of the instrument panel and radio rack (Photo 6).
After many hours of labor, I had the panel wired and the instruments installed. I also prefabricated the overhead switch panel at the same time. You can see it to the right of the instrument panel (Photo 7).
The radios are a King com radio on top and a King transponder on the bottom. I also use a GARMIN 195 GPS strapped to my left leg to assist me in navigation. The main control element of a helicopter is the cyclic stick.
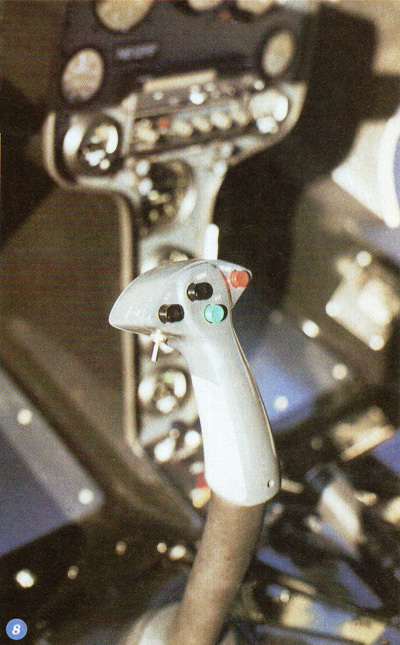
First, I wired the cyclic handles. It’s a well-known fact that a pilot cannot let go of the cyclic stick while flying a helicopter. Unlike an aircraft, a helicopter needs constant stick response.
Because of this, many functions are installed into the grips, among them the radio flip/flop switch, engine start button, transponder IDENT button, any other accessories and the push-to-talk switch.
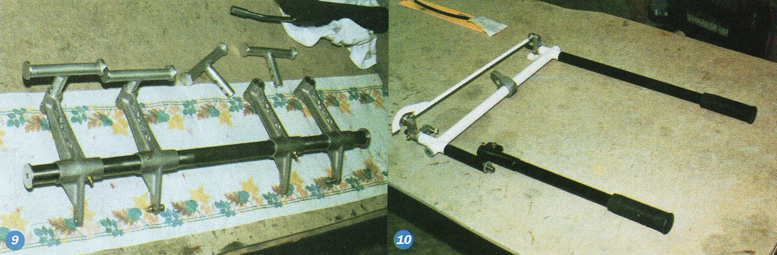
I reworked the cyclic stick a bit and ended up with a fit that was perfect for my hand. Note the buttons for the various functions (Photo 8). A good friend of mine, Bill Messer, owns an engine rebuilding shop and a connecting rod honing machine.
He honed the anti-torque (rudder) pedal to a perfect fit. We then added a ZERK fitting to both of the moving pedals. The other two pedals are bolted to the shaft and do not need grease fittings (Photo 9).
I finished the controls in the cockpit by adding the two collective throttle controls. The one on the passenger’s side can be removed, but I keep mine installed at all times. The pear-shaped casting on the shaft is the throttle stop, which is welded to the shaft (Photo 10).
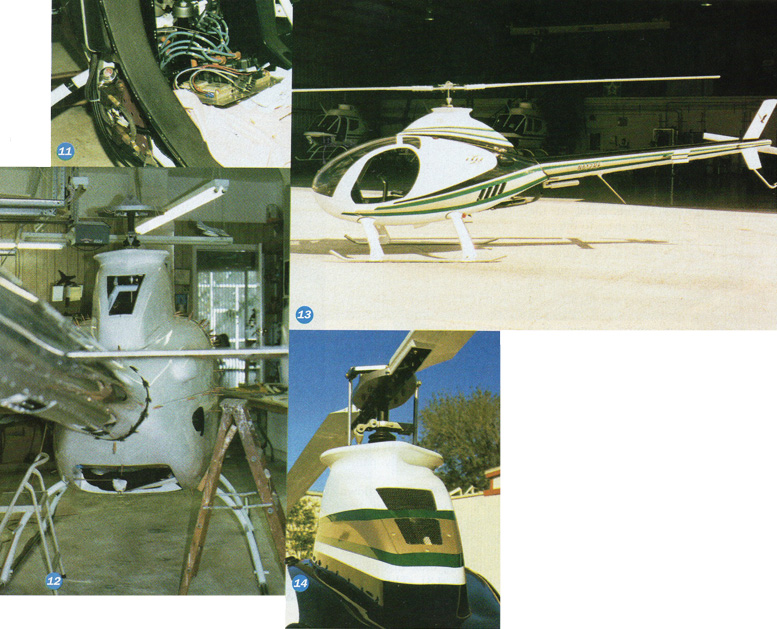
The final assembling was getting closer to being finished. This view is looking rearward on the right side. This is the location of the fuel pumps and ignition racks and ignition wiring (Photo 11).
Next, it was time to start assembling the rotor head. As the Exec became ever more fully assembled, it was getting to be a tight fit in my workshop/garage. At this stage I was still attaching fiberglass body panels (Photo 12).
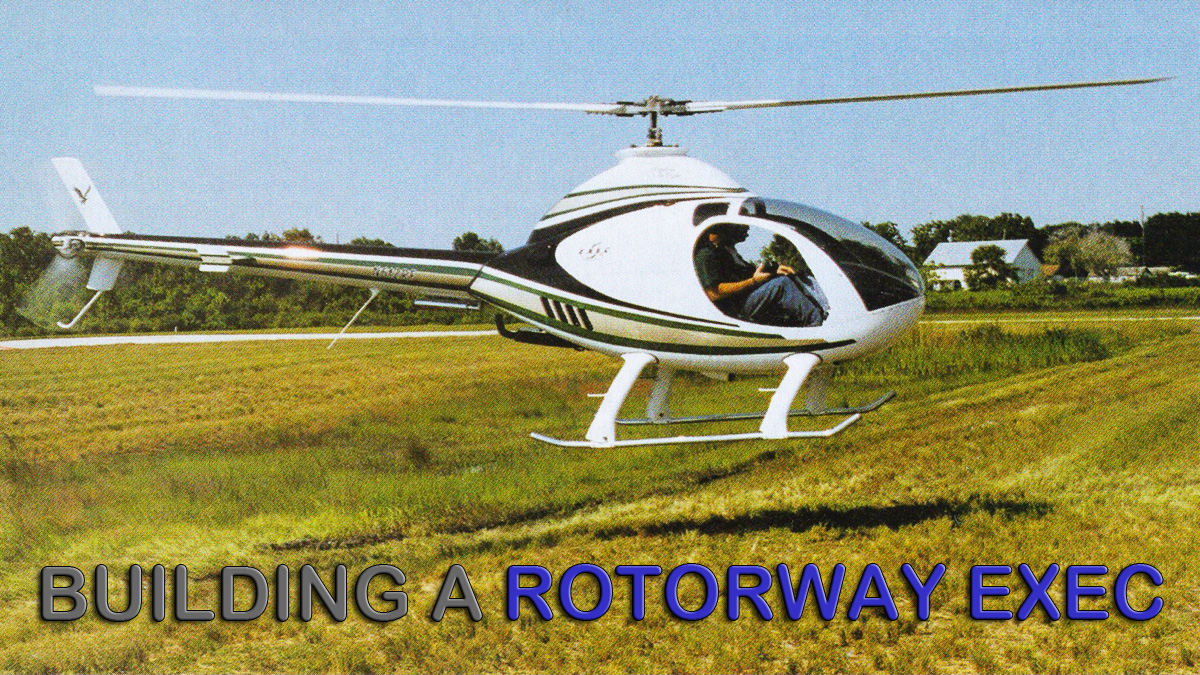
The Exec was test-flown in a series of hover test-hops. When the test flights proved successful, I reattached all the panels to the body and took this picture (Photo 13). The entire building process took me 1800 hours during a 15-month period.
I also modified the rear of the “doghouse” with another screen for additional cooling. It gets pretty hot down here in Central Florida (Photo 14). I also designed a “Freedom Eagle” design that I applied to the tail of the Exec.
I then added a “Freedom of Flight” logo to the side of the doghouse. The last logo I applied was my rendition of the “Exec 90” logo that corresponded to the version of the RotorWay I built. The latest Exec is called the 162F.
This version has FADEC controls for even smoother engine power. I thought the required “Experimental” declaration was a bit boring, so I changed the type style to a more modern font for a result that, I think, adds to the overall effect of the finished aircraft.
Learning to Fly my RotorWay Exec
I learned to fly in my own Exec after participating in the flying program at the RotorWay factory in Arizona. What amazed me most about learning to fly the Exec was how different it was from flying model helicopters.
My main problem was learning to hover correctly, but with the help of experienced flight instructors—and a great deal of persistence — it suddenly all came together. I’m now a rated rotary-wing pilot.
As of press time, I’ve logged more than 230 hours of flight time in my Exec, and I’m especially fond of taking good friends up for rides — particularly those who helped with their advice and physical labor throughout the construction of my RotorWay Exec, my pride and joy.
Does it fly well? You bet it does.
If you’re wondering whether I think that 15 months of intensive work building my Exec was worth it, my answer is: You bet! I especially felt that way when I picked up the Grand Champion Award at the EAA’s Sun ‘n Fun 2000 in Lakeland, Florida.
Editor’s Note: I met Bob Fiorenze many years ago when I was the editor of Scale R/C Modeler. Fiorenze, an experienced builder of outstanding scale models, is a family man who has been married to his wife, Anne, for 27 years, and they have three daughters.
His ducted-fan models of McDonnell Douglas F-4 Phantoms, finished in the U.S. Navy’s dark blue airshow color scheme, were spectacular. When Fiorenze flew his F-4, activity at the meet would come to a halt.
Not only was Fiorenze a museum-quality scale-model builder, he was an acclaimed worldwide championship flier—an exceptional combination of talents and dedication seldom found in the same modeler.
Fiorenze’s background was in building competition automotive engines back in his native Brooklyn, and it paid off with flawless running of the very finicky high-rpm engines used in the ducted-fan power units.
He eventually moved to the Orlando, Florida, area where he became involved in designing and building miniature helicopters, and researching the theory of building an operating Harrier Jump Jet.
That project never became a reality, but to obtain practical experience for the Harrier project, Fiorenze taught himself to fly model helicopters. He has a fixed-wing rating but had zero helicopter time. The thought of building his own full-size rotary-wing aircraft remained a dream until he read an advertisement in Trade-a-Plane.
I had not heard from Fiorenze for many years. Then, while reading a press release from RotorWay in Arizona, I suddenly came upon the news of Fiorenze’s winning Exec. When I called him, he said he’d be glad to share his experiences of building an Exec, as well as some photographs he’d taken during the construction process. The following article and photos are the result.
Norm Goyer
The paint scheme you did is beautiful, I want to do the same to mine if I ever finish it.
Hi Raymond, the task can seem quite daunting for most of the journey. Many give up, but there are the few that keep at it and end up with unparalleled satisfaction of the completion – which one will you be? Good luck…keep chipping away at it!