
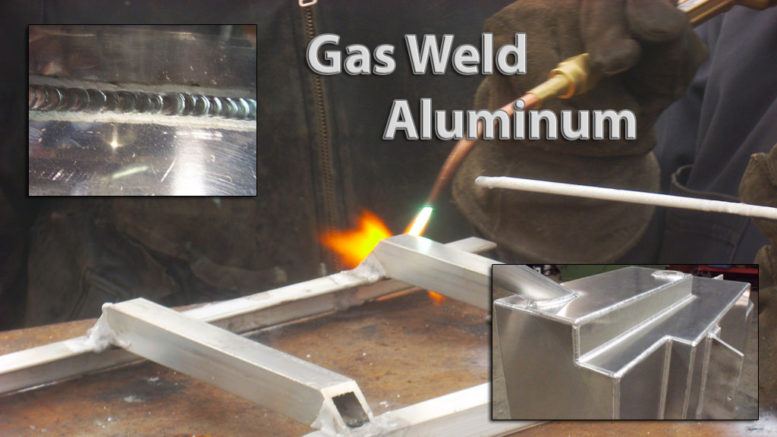
Secrets Of Gas Welding Aluminum
Oshkosh Workshop Aluminum Welds
Workshop tips from a master on fusing lightweight aircraft metals with gas and hydrogen.
The decades-old myth holds that the gods Mig, Tig and Heliarc reign omnipotent over the Land of Aluminum Welding, and no other god dare encroach upon their territory, lest he be rewarded with unsafe matings of the silvery metal when Welding Aluminum.
The happy truth is much different, for aluminum welding with gas and hydrogen, like oxyacetylene welding, is a skill that can be learned and readily practiced by the novice.
During World War II, production-line aluminum welding of combat hardware, like aircraft components, was done using hydrogen and oxygen, the same way oxygen and acetylene are widely used today to weld 4130 chrome-moly steel.
There is skill required, so you’ll have to practice before you leap into welding up that nosewheel fork or your 15-gallon wing tanks, but take heart; at the top of the learning curve, you’ll have developed the ability to construct several parts for much less money than the costly electrical welding methods mentioned above, without having to use an oxygen-free atmosphere or other special-handling procedures. And of course, there’s the ever-present pride that comes with fabricating your own parts.
Welding Aluminum Professionals
Our workshop instructor is Steve Neander, EAA member and co-owner of Crane Service Inc., of Midlothian, III. This article would not have been possible without his valuable knowledge, gleaned from years of welding experience.
Instructor Neander recommends following a sequence whenever you weld: Set your tank and line pressures, make sure you have the right tip for the job. have your glasses and flux ready, start the torch and adjust the flame, coat the rod with flux, put on your glasses, preheat the parent metal….and start welding.
Welding aluminum sounds easy, doesn’t it? It’s not. You must learn to crawl before you walk, but with practice, you’ll have the skills you need to make welds that are as sound as any you could pay a pro for.
The Steps To Successfully Welding Aluminum
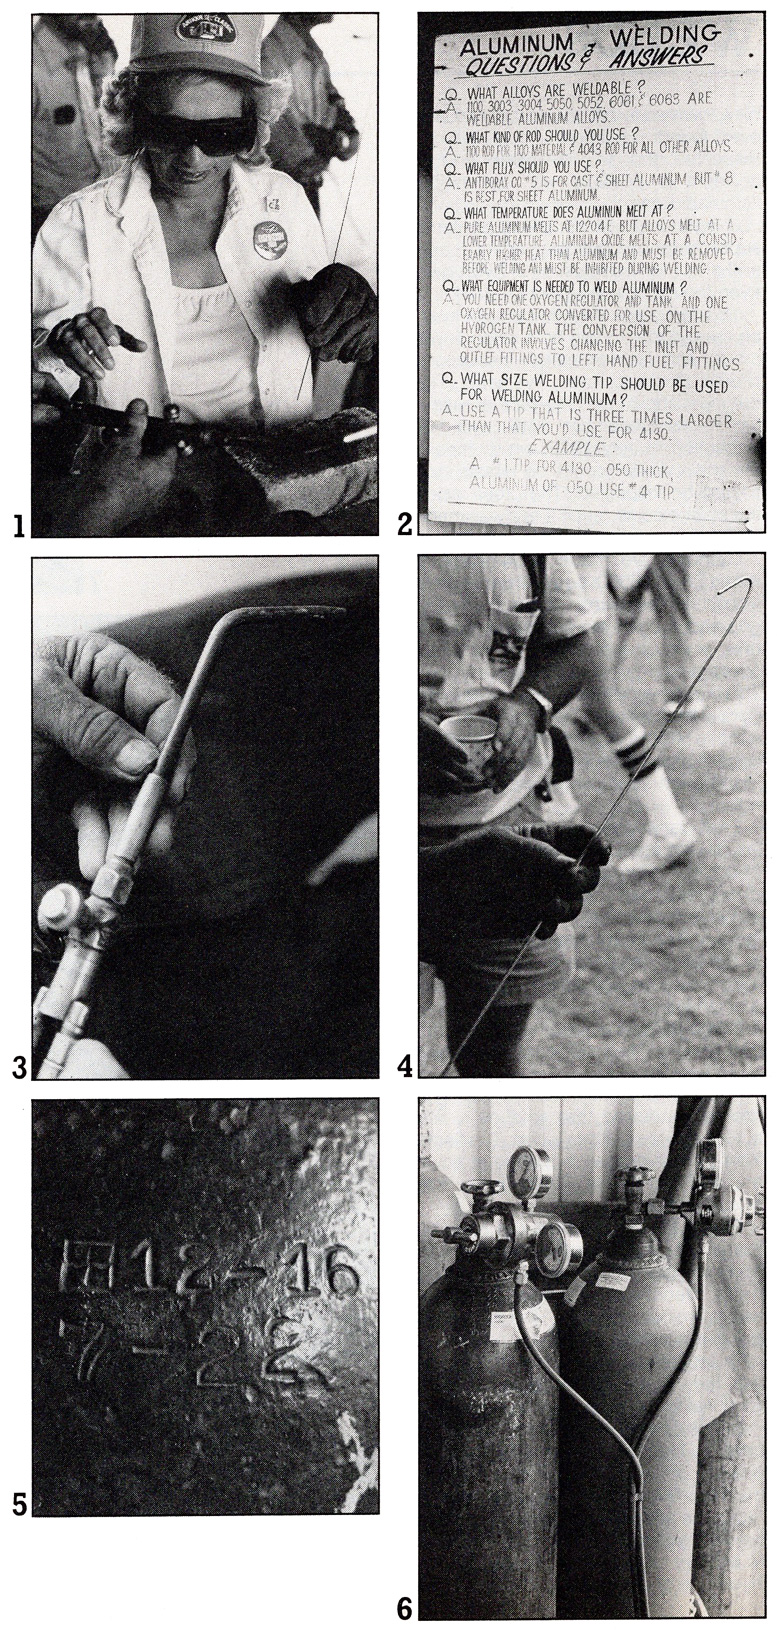
Photo 1: Hands-on experience brings many potential homebuilders to the Oshkosh workshop gazebos to try their hand at skills like welding Let’s get started.
Photo 2: Plaque hanging inside the Oshkosh welding workshops is worth at least 10 times its 250 words.
Photos 3 and 4: Standard torches and equipment are used for welding aluminum, although a tip size three to four times larger than that is used for the same thickness as steel required.
This is because a “softer,” less focused flame is required for aluminum; a lot of heat is required to keep a large part of the aluminum part close to its melting temperature so that the metals will flow together with the rod and make a fully penetrated weld. Too much heat concentrated in a small area will melt right through the metal before you can weld it.
As mentioned on the plaque, the welding rod to ask for at your local welding shop is either 1100 or 4043, depending upon which material you’re welding. The rod shown here does not have its coating of antiborax flux yet.
Flux is used to remove any aluminum oxide from forming during heating, and to prevent the metal from oxidizing at the same time. Making sure the rod is dipped in flux periodically is all that is required when welding aluminum.
Photos 5, 6 and 7: Hydrogen is a fuel.
The Hindenberg blimp disaster during the Thirties has forever given hydrogen a bad name, but, in truth, it is no more dangerous, properly handled, than the acetylene fuel commonly used for welding steel. Hydrogen actually doesn’t require as much special handling either. One welder, according to instructor Neander, was welding near a leaky acetylene tank.
The acetylene ignited, the tank blew and the explosion literally blew the man to bits; no part of him was ever found. Hydrogen must still be respected, though. The same kind of accident is possible with the highly flammable gas.
Oxygen is used as a kind of flame supercharger, a controlling agent. It aids and abets the combustion of hydrogen, even though it won’t burn by itself. You can check the numbers stamped on the cylinder to see both when it was made, and last inspected. Inspections should take place every five years.
The numbers shown indicate date of manufacture as December 1916, and last inspection in July 1922, which means that this cylinder could be unsafe and should be inspected. The cross inside the square could mean that it was made in Germany during the war.
Cylinders are made to withstand a maximum of 5000 pounds per square inch (psi) of pressure. Gasses like hydrogen and oxygen are not stored at presures of more than 2500 pounds per square inch, giving a 2:1 safety margin.
This is wise; a cylinder that ruptures can literally level a house, so explosive is the sudden release of pressure. Even worse is the thought of a rocket-like missile tearing through your garage wall into your house.
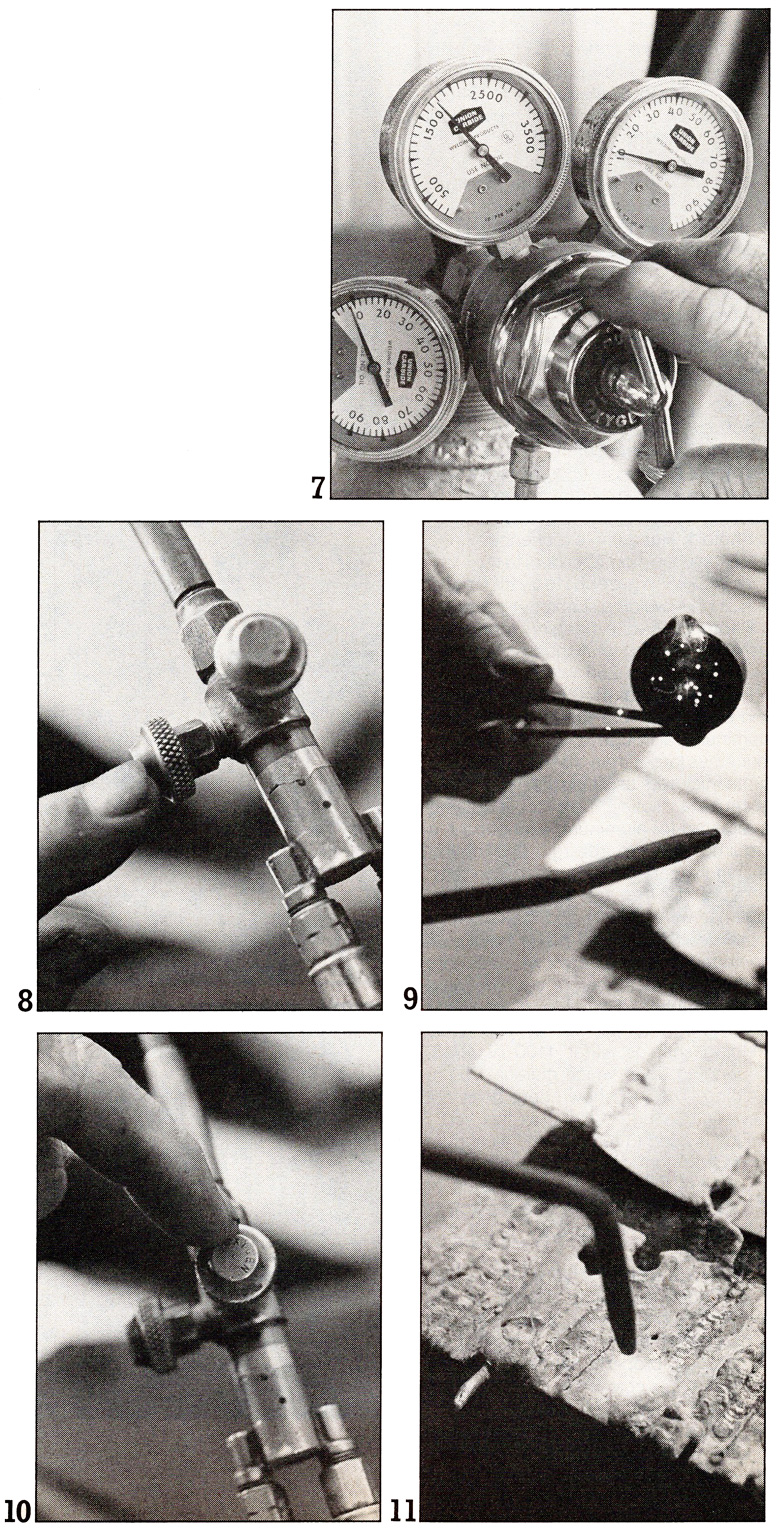
Each tank has two pressure regulators. One shows pressure in hundreds of psi, the other in tens. The hundreds dial reveals tank pressure, the tens shows line pressure. Pressure of each individual can vary; line pressure going to the torch should be the same, about 10 psi or so on both the hydrogen and oxygen lines.
Photo 8: When welding aluminum, start by opening the hydrogen valve on the torch one-quarter turn or so.
Photo 9: Light the torch by using a sparker, a device that scrapes a flint across a piece of file in a cup. The flame from pure hydrogen is orange in color, and wild and diffuse, like the wavy fans of a log fire.
Photo 10: Now dial in the oxygen.
Remember, oxygen is the controller and supercharger of the flame; it cleans, heats, intensifies and controls the flame, which is your objective. The goal is to achieve a neutral flame.
To set the torch (do not wear goggles yet, they make the flame invisible — essential for welding, useless for setting the torch), hold the tip about two inches from a firebrick, the nozzle pointing straight down. The brick will contaminate the flame so you can easily see it. Open the oxygen valve about the same amount as the hydrogen.
You’re trying to achieve a 1:1 ratio of oxygen to hydrogen at the tip. Remember that the wild hydrogen flame gives way to a soft column when mixed with oxygen. You’re looking for a continuous, uniform flame with a controlled circle as it strikes the firebrick.
Indicators to look for: too much hydrogen, and the flame will be washed out.
Too much oxygen, and the flame will be pinpointed; you may hear the whistling of the excess oxygen in the mixture, and you’ll have a hot point instead of a nice, round circle on the brick Your goal is a neutral flame similar to that of the gas jet on a stove.
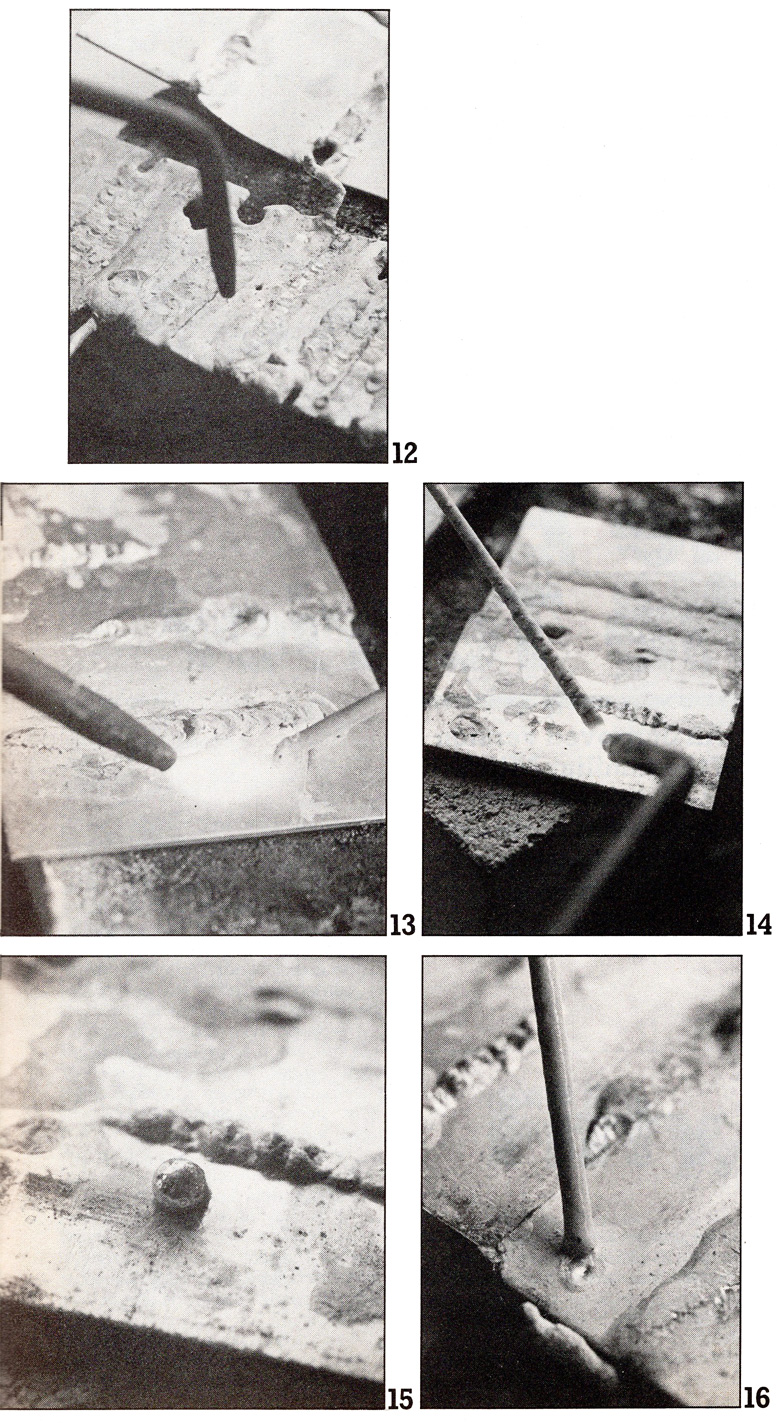
Photos 11 and 12: Wear a pair of pink didymium-glass goggles to block out the yellow flux-contaminated flame from your vision so you can see the metal under the torch. The photo above right (12) shot through goggles, shows how the flame disappears when seen through the goggles.
Photos 13 and 14: Now for a quick practice session on welding aluminum:
The idea with aluminum welding is to heat the pieces of metal to be joined, called the parent metal, to near its melting temperature, then introduce the welding rod, which is the aluminum material that will “glue” or fill the joint.
[FreshProduct productGroup=”dhc2000pro_1519175286″ showimage=”yes” showprice=”yes” showtitle=”yes” align=”right” buttonclass=”” buttontext=”Buy Now” newwindow=”_self”]
A good starting point is to angle the torch at about 45 degrees from the work surface. With practice, you’ll develop your own style. Angle the rod about the same. Now, heat the parent metal until you begin to see it go molten, or “puddle.”
Recognizing what you’re looking for in this step is the hardest part of the learning process, so pay attention. Pre-heat the entire piece, just bathe it in flame, because aluminum absorbs or “captures” heat rapidly.
The puddle looks something like the surface of water in a glass when you blow on it, i.e.. wrinkled. It also turns 14 slightly grey in color, and will begin to sink into a concave depression. At that point you should add the rod, otherwise the puddle will “fall through” for lack of material.
Once you see the puddle, dip the rod directly into it. At this point you want to set up a rhythm of heating the work. First for some no-no’s for welding aluminum.
Photo 15: If you heat the rod before the parent metal is molten, or puddled properly, you’ll end up with something like this, called a cold weld. The two materials haven’t joined properly.
Photo 16: If you pull your torch away before you’ve heated the rod sufficiently to melt and flow, you’ll end up sticking the rod to the parent metal. You’ll have to heat the whole piece all over again.


Super informative article, though slightly misnamed. Mastering this will take endless practice. I’ve welded steel for years (SMAW, GMAW) and have done a fair amount of TIG welding aluminum, but this article has me fired up enough to invest the $$$ and give gas welding a serious go. Thank you.
I need aluminum kattle spout welding I have no idea plz help me I search but I didn’t get any result plz help me
Thank you. The name should be GAS WELDING ALUMINIUM WITH HYDROGEN.
Pity no reference was made to using the more commonly available ACETYLENE