
Building The Rotorway Kit Helicopter
Executive Decision: THE FINAL CHAPTER
With hover school final assembly and instrument outfitting under his built, Ray Sebastian’s construction odyssey ends with plans for a rotary future.
ARTICLE DATE: November 1986
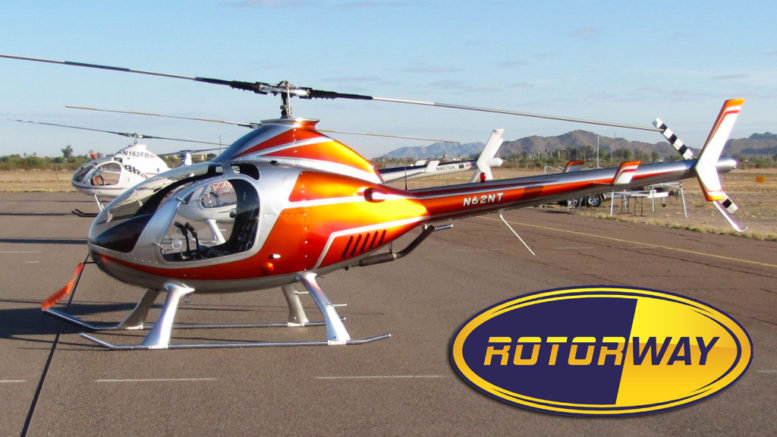
It’s been months since our seventh installment (February 1986) on building the Rotorway Exec helicopter, that fabulous two-place medium-range helicopter that’s revolutionized the homebuilt industry. Now it’s time to break out the champagne because Ray Sebastian’s Exec is complete, and a beautiful piece of work it is indeed.
In this, our eighth and final piece on Builder Ray’s devoted odyssey, we’ll dispense with most of the verbiage and let the pictures treat you to the feast (except for the companion piece on Sebastian’s five days at the RotorWay Hover School.
You don’t want to miss that). In April of this year, Sebastian met a fellow builder, Gary Wilson of Palmdale, Calif., through the RotorWay factory. Wilson, a building contractor in his mid-30s, had bought all seven stages of the kit at one time and was determined to go hell-bent for leather and build his ship in the absolute minimum time.
Since Sebastian had done his Rotorway Exec helicopter from the outside in, by constructing and assembling the frame, tail boom, rotor head and controls before installing the engine and drive system, he was the ideal person to assist Wilson, who was building his ship from the inside out.
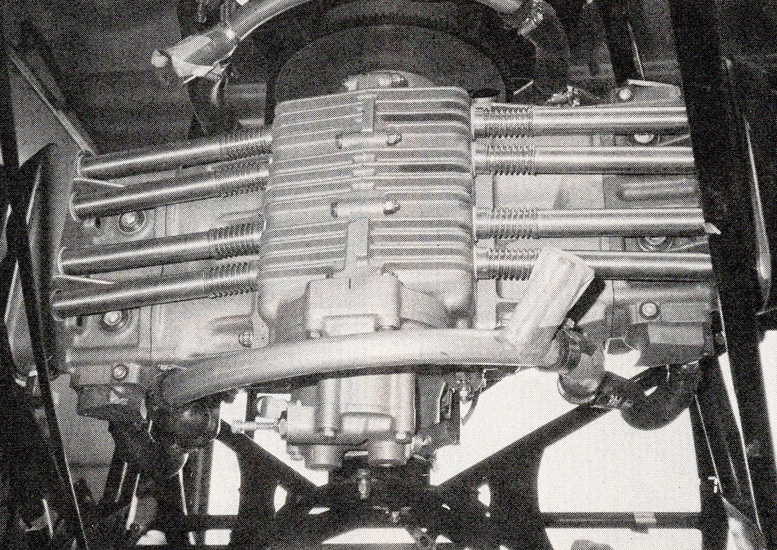
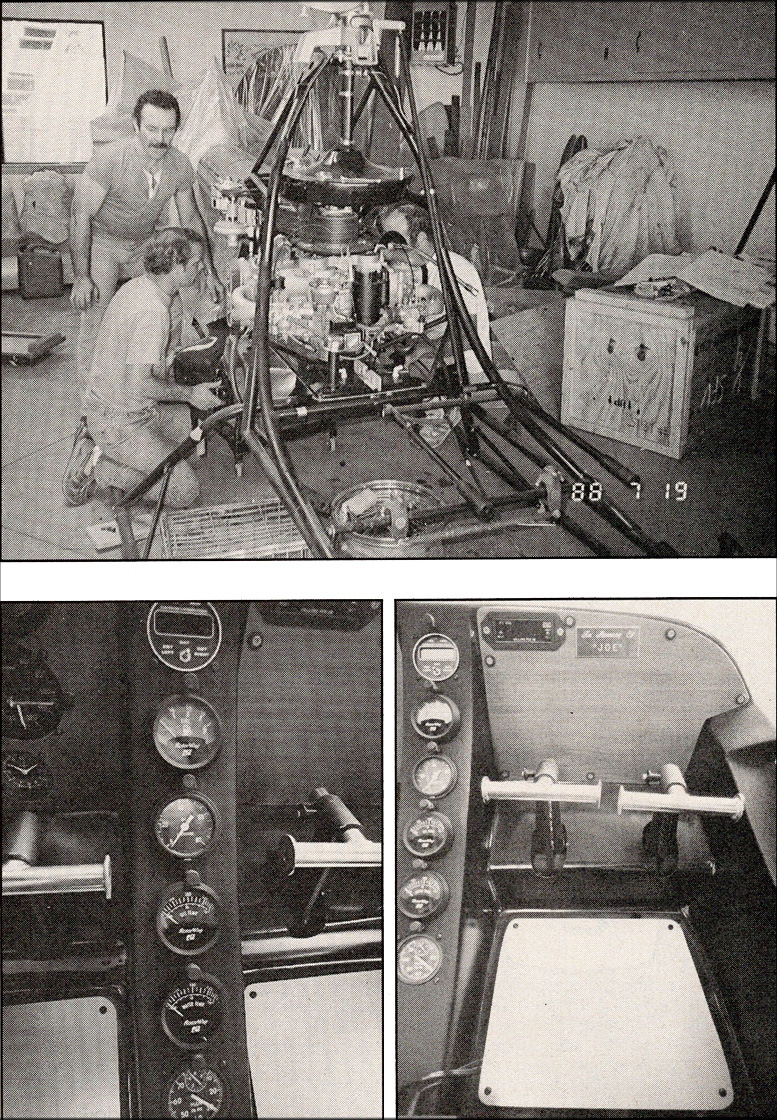
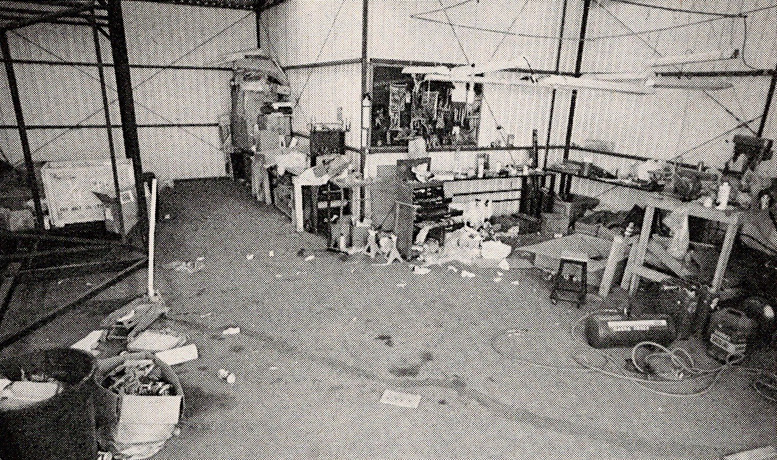
Looking up and forward from rear of chopper at engine. Curved pipe at bottom foreground is engine coolant tube. Springed tubes are pushrod tubes.
In fact, Wilson finished his entire engine compartment in only one month, an impressive accomplishment by anybody’s standards. Thus began a working partnership that had Builder Ray driving 2 hours round trip to the desert in the evenings and most every weekend.
He squeezed his ship into Wilson’s three-car garage for the interim and advised Wilson on his own Exec. When Wilson’s ship was done in an incredible four months, it was his turn to assist Sebastian with fitting the RV 152 engine to the already completed airframe.
By July, both ships were done, and now Ray Sebastian has a flying buddy, not to mention one of the most stunning aircraft around. But would he do it all over again? He winks, smiles and pats his shiny new baby. “What do you think?”
The Adventures Of Hover Man With His Rotorway Exec Helicopter
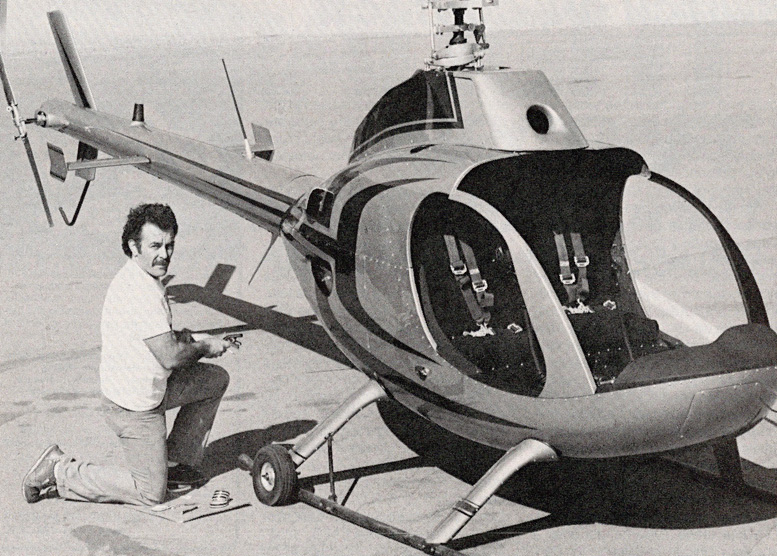
A boy and his steed. Ray Sebastian applies trim tape to the landing gear struts.
A homebuilt project isn’t finished just because the airplane is ready to fly, you know. Even the simplest ultralight would have a fool for a pilot who flew without at least an airspeed, altimeter and engine temp gauge.
Gary Wilson and friend drilling hole in pitch horn for control rod end attachment.
And for absolute seat-of-the-pants bare minimums you must have at least an engine temp. Like all homebuilders Ray Sebastian went through an education process in determining which instruments he should put in his Rotorway Exec helicopter and what the market had to offer.
Since budget considerations were as critical for Sebastian as most kit builders, whenever possible he went to the least expensive unit to get the job done—but quality and capability of the instrument were always the first priority. Following is a surprising list of just how much you can shoehorn into a homebuilt aircraft.
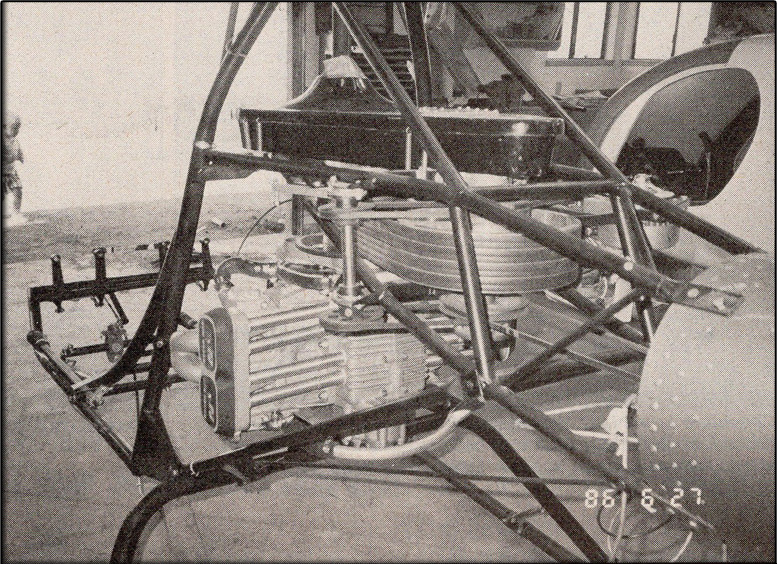
Installed engine, coupled to primary chain drive. RV 152 engine develops 152 hp. Note chain oil bath at top, reduction drive belts at center, engine block at bottom.
Obviously, individuals may make different choices as to what they feel is needed and what their friends recommend, but we thought you’d get a kick out of the diversity and breadth of equipment you can end up putting in your ship. The total accessories tab, including paint, was around $6,000.
We’ve included names and addresses for more information (1986):
-
STS 7600 VOR handheld navcom radio, STS Loran C, contact: Satellite Technology Services, 2310-12 Millpark Dr., Maryland Heights, Mo. 63043, (314) 423-5560.
-
FT 101 fuel totalizer, contact: Symbolic Displays Inc., 162 McGraw Ave., Irvine, Calif. 92713.
-
Ball variometer, winter airspeed and altimeter, fuel sender, quartz clock, contact: Sky Sports, 2900 Kanuga, Hendersonville, N.C. 28739.
-
Three-button pistol grips, toggle breakers and relays, post lights, contact: Flame Industries, 20945 Osbourne St., Canoga Park, Calif. 91304.
-
Vertical card compass, contact: Hamilton Instruments, 106 Newhaus, Houston, Texas 77061.
-
Manifold vacuum gauge, contact: Avion Instruments, 5710-12 Cahuenga Blvd., N. Hollywood, Calif. 91601.
-
Position lights and strobe flasher, contact: Whelen, 3 Winter Ave., Deep River, Conn. 06417.
-
Airman 750 headsets, TC 200 intercom, push-to-talk button, contact: Telex Communications, 9600 Aldrich Ave. S., Minneapolis, Minn. 55420.
-
Exhaust temp and outside air temp gauges, LCD display, contact: Electronics Int., 5285 N.E. Young, #A100, Hillsboro, Ore. 97123.
-
Antennas for navcom and Loran, contact: Antenna Dynamics Inc., 7349 Coldwater Canyon #2, N. Hollywood, Calif. 91605.
-
Durethane aircraft paint, contact: PPG Industries, Ditzler Paint Division, 4473 Sheila St., Los Angeles, Calif. 90023.
-
Ten-watt linear radio amplifier, contact: Communications Specialists, 426 W. Taft Ave., Orange, Calif. 92665-4296.
Building A Rotorway Exec Helicopter: Epilogue
Building a complex two-seat helicopter, even one as beautifully kitted up as the RotorWay Exec, is a labor of love, demanding a commitment of time, energy and patience. So when it came time for Exec homebuilder Ray Sebastian to take a break from the demands of the Kit Wars, it seems fitting that he chose to “relax” and have some fun by learning to hover a helicopter.
Before you nod your head in agreement, consider that flying a chopper is about as easy as juggling three live lobsters (with untaped pincers) while doing a tap dance, spinning a hula hoop and reciting the Rubiyat of Omar Khayam. . on a bolo board. Remember bolo boards?
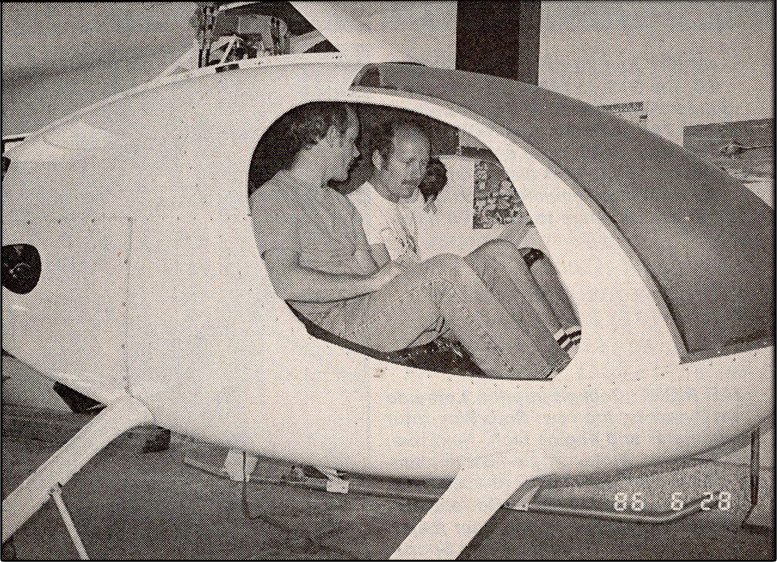
Gary Wilson and friend Andy in Wilson ‘s Exec, performing hang test to check proper center of gravity placement with two people aboard. Test was also performed with only the pilot aboard.
But there is no hardier vision than the dream of the long-distance helicopter pilot-to-be, and so May 26 of this year found cadet Sebastian at the RotorWay Hover School in Arizona for the five days of rigorous hover training that are included in the price of the Exec kit.
Come with us now to those days of yester-month, as we follow our earnest cadet in his quest for the solo checkoff on his Class III medical certificate.
The first day is a blueprint for the entire five-day course. All four students turn in their medical certificates and pilot logbooks to the staff. An introductory video tape narrated by RotorWay President B.J. Schramm, explains the five-day course.
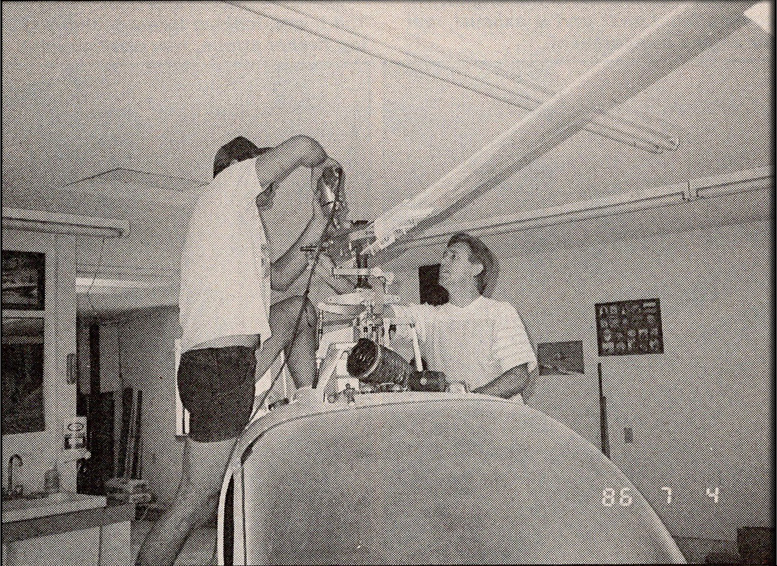
TOP: Ray Sebastian helps out In the final adjustments to Gary Wilson’s engine installation on his Exec helicopter.
LEFT: Center panel of cockpit from top to bottom: Electronics Int. twin EGT and OAT (exhaust gas temp and outside air temp gauges), has LCD readout; RotorWay fuel gauge; Stock Stewart-Warner oil pressure gauge; RotorWay oil temp gauge, RotorWay water temp gauge; Avion Instruments manifold vacuum gauge.
RIGHT: Right side panel. Symbolic Displays FT 101 fuel totalizer, left and memorial placard to flying buddy of Sebastian.
Two students each are then sent off with an instructor for the first flying session. Hover Man (aka Sebastian) finds himself sitting next to his tutor, a tall, lanky gentleman with the unlikely (but true) name of Stretch Wolter.
Wolter is the senior instructor at RotorWay with 10 years of experience under his belt. After showing the engine start and run-up procedures, Wolter turns to Hover Man and says levelly, “What I’m about to show you is all I will expect of you by the end of the week.”
He then adroitly lifts the Rotorway Exec helicopter into a delicate hover about 1 foot off the ground and smoothly moves the ship forward in a straight line to the next helipad about 50 feet away. He lowers it gently to the ground and turns to Hover Man. “Getting to that level of proficiency will take every bit of commitment from you over the next five days,” says Wolter.
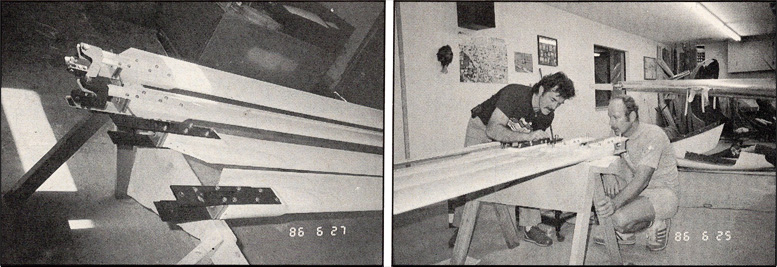
LEFT: Chocolate or vanilla? Wilson’s blades, top, already have pitch horns installed. Sebastian’s at bottom have black retention straps that will attach to elastomeric rotor head with AN bolts.
RIGHT: Sebastian attaching the pitch horns to his blades.
Hover Man merely gulps, nods and smiles gamely. “Piece of cake,” he says affably, trying to remember the mantra he learned in yoga class—the one that allows you to tie your body into a pretzel without feeling pain. He has a suspicion he’s going to need it.
Next, Wolter lifts the ship 1 foot off the ground. “You start with the foot pedals. Maintain a straight heading forward, and I’ll take care of everything else.” The foot pedals control the left or right thrust of the tail rotor, and thus the yaw axis of flight.
Hover Man is initially a little hamhanded, as he finds himself overcorrecting left and right. The Rotorway Exec helicopter is wonderfully sensitive in yaw, great once the feel is acquired, frustrating until then. Hover Man learns to apply increments of input to the rudder bars very, very gingerly.
Tap dancing isn’t so tough after all. “I was relaxed,” he remembers, “because I had spent a lot of time predisposing myself to be relaxed, because your coordination is better if you’re relaxed.”
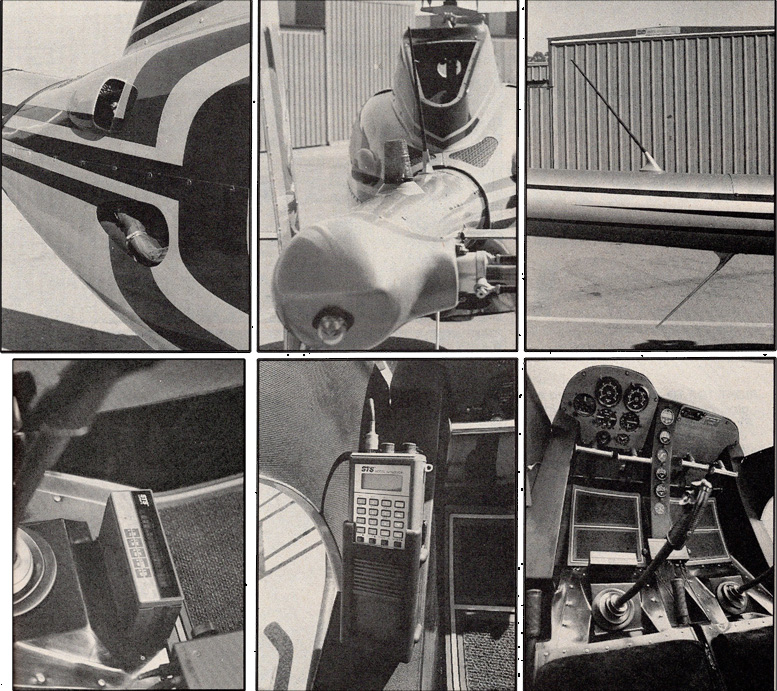
TOP LEFT: Looking aft from right side of Exec. Top scoop directs air to the engine cooling fan. Lower port is exhaust vent for engine compartment.
TOP CENTER: Tall boom, looking forward, showing top flasher strobe, rear position light.
TOP RIGHT: Finished Installation of navcom (upper) and Loran antenna (lower). Antennas are custom made by Antenna Dynamics of North Hollywood, Calif., and offer navcom range of well over 100 miles.
BOTTOM LEFT: Installation of STS Loran C is just in front of pilot’s cyclic stick.
BOTTOM CENTER: Just introduced at Oshkosh 86, the STS AV7600VOR navcom is builder Sebastian’s choice. Handheld , unit has 720 channels plus VOR, retails for less than $400. Note antenna coaxial cable at top of unit that connects to 10-watt linear amplifier, not shown. Amp boosts range to over 100 miles.
BOTTOM RIGHT: Cockpit interior. Left-side instruments, top row: RotorWay rotor tachometer and engine tach. Next row, left to right: Winter single-needle altimeter, Ball variometer (0-1500 fpm), Winter airspeed indicator. Bottom row, RotorWay Hobbs engine hour meter, quartz clock from Sky Sports.
After only half an hour, Hover Man climbs out for a welcome rest while his classmate climbs in. It is a company edict that hover students will fly no more than 1 hour per day total, in 30-minute bites.
Learning to fly a chopper is a “total mental immersion,” says Hover Man, and can be extremely exhausting at the end of an hour. RotorWay strongly urges its customer/builders to continue the same practice in their private hover training when they get back home; i.e., no more than 1 hour per day in 30-minute chunks.
“Otherwise,” cautions Hover Man, “you could have a total mental meltdown at an inopportune moment—like during hover. You might say the company motto is, ‘We will solo no pilot before his time.’“
Once they’ve learned to hover, students must accumulate at least another 35 hours of hover practice. Then they’re ready for phase two — airplane-type flying with climbouts, turns, banks and automations. Hover Man’s second half hour introduces the cyclic stick, which controls the roll and pitch axes of the ship by tilting the rotor disk.
Once he has a basic feel of the Rotorway Exec helicopters cyclic, Wolter has him resume control of the pedals as well. So now it’s the lobsters with the tap dancing. Hover Man is amazed at how much responsiveness the optional elastomeric hub gives to the control.
Movements of only 1/8th inch on the stick are all that is needed for movement in any horizontal direction. By the close of the second half hour, Wolter tosses in the hula hoop by giving control of the collective to Hover Man. The collective dials in pitch to the rotor blades.
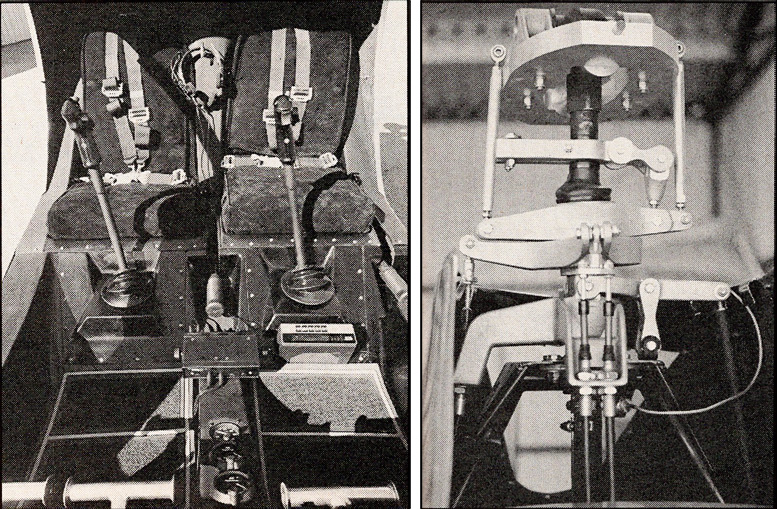
LEFT: Ready and waiting for the maiden voyage. Telex Airman 750 headsets between seats are plugged into center-mounted TC 200 intercom, mounted just forward of center collective stick between seats.
RIGHT: Close-up of elastomeric rotorhead, optional from RotorWay, showing push-pull rods and bracket attachments. Note rotor tach sensor and cable, lower center Each stick has a three-button pistol grip from Flame Industries. Top button operates starter, trigger handles radio push-to-talk, third button on right side is pilot optional. Would you believe twin .50s?
Once Hover Man manages to stabilize everything, Wolter tells him to initiate forward movement by “just thinking” forward. “Reluctant believer that I was,” Hover Man recalls cheerily, “I found the ship actually responding as if to my thought.” Now Hover Man is in the thick of it. juggling, dancing, balancing.
As is typical for all new students. Wolter has to assist at the controls on several occasions. The day ends with Hover Man slightly humble but game as ever. “It’s a bit overwhelming at first. Don’t expect a lot of yourself the first day.”
With encouragement from Wolter that he is on par with the goal of the course, the weary cadet heads back to the classroom. There, a short critique of the flying is followed by a question/answer session. A discussion with the instructors on parts and components and a viewing of video tapes on construction procedures finishes off the day.
At the end of the five days, Hover Man straps in next to his instructor for the final goal flight of lift off, straight line hover to the next helipad and set down. Though he’s worked hard, his proficiency is not at the level he had hoped for, and he is concerned he might not receive his checkoff.
“It’s sort of like learning to drive stick in heavy traffic at age 15,” he says with chagrin, “on your first day of driver ed. . . with a gorgeous redhead watching you from the back seat. There’s just so much to deal with at one time.”
Nonetheless. Hover Man knows he’s made progress, and he tackles the task gallantly. After liftoff, he manages to complete the demanding 50-foot slide and get the Rotorway Exec helicopter back on the ground.
Though not picture perfect, it’s good enough for Wolter’s demanding requirements. Hover Man receives his solo checkoff. Ray Sebastian is a happy man. He knows he has the basic wits to hover a chopper and build up his skills on his own.
At times during the week, the lobsters pinched his nose or the hula hoop dropped to his ankles, and he wasn’t sure he’d be able to do it. But determination and RotorWay’s years of training experience has made the rigors of the course exactly what it takes to get a person, well, off the ground.
Next stop, the solo of his own Rotorway Exec helicopter. Then on to phase-two training, and the transmogrification of Ray Sebastian from Hover Man to Whirly Man, champion of truth, justice and the rotorcraft way!
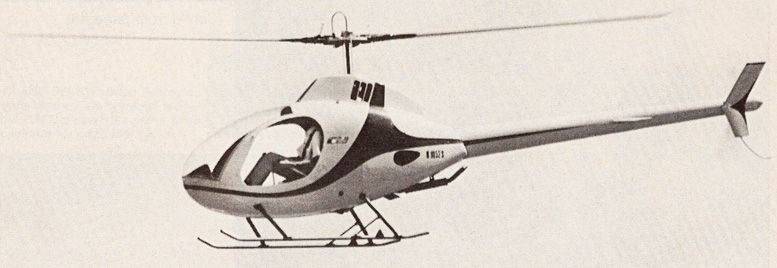
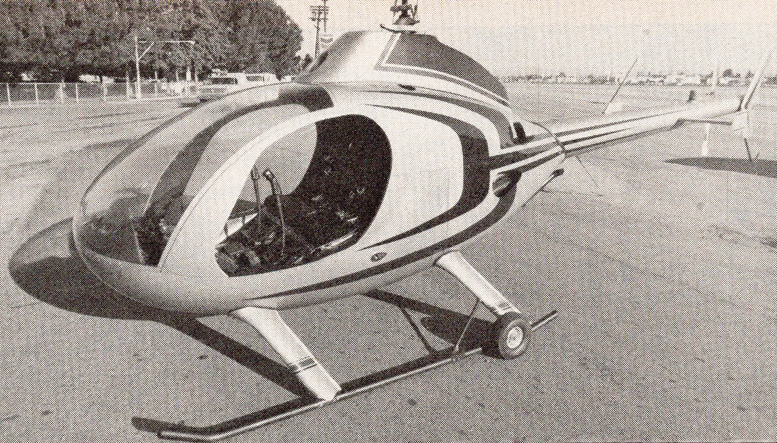
The morning after the year before. Or, in builder Sebastian’s words, “The bird has flown the coop.”


Be the first to comment on "Rotorway Exec Helicopter Build Part 7"