
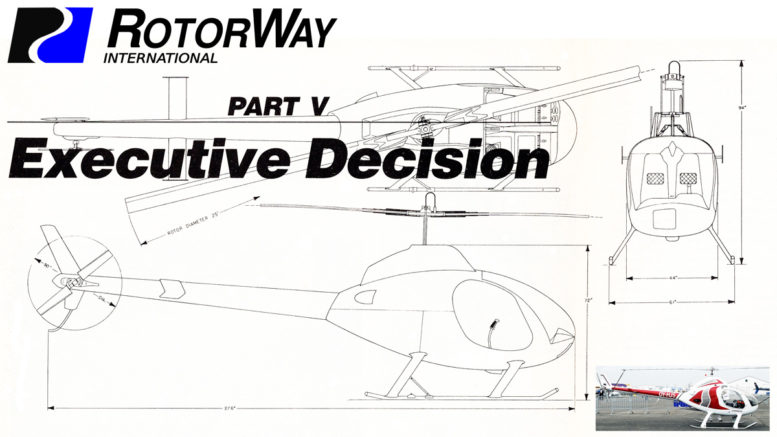
Building The Rotorway Kit Helicopter
Our construction series continues with the bare bones of RotorWay’s newest Exec helicopter homemade whirlybird
ARTICLE DATE: December 1985
Christmas isn’t too far down the road now, and visions of hover training are beginning to dance in our erstwhile builder Ray Sebastian’s head. In our series so far, we’ve taken close looks at the tailboom assembly, and tail rotor construction and installation. Best we not neglect the bones of the enterprise any longer.
RotorWay offers the Exec helicopter airframe package in two ways:
…all the tubing and parts needed for the builder to do the work, or the Airframe Special option which, for a cool $2,500. provides you with a finish-welded airframe ready for some minor attachments, prepping and painting. As an incentive to the builder, RotorWay offers the Airframe Special free if the entire kit is paid for at the outset.
Although Sebastian didn’t have the capital to go whole hog in the beginning and qualify for the free option, he reasoned that the Special was a worthwhile investment because it would save him 80 hours of work and around $500 of professional welding by an FAA-certified airframe welder.
“My time is more valuable than the $25 per hour I would have saved, and I’m not a welder and wasn’t particularly interested in learning on my own aircraft.” remembers Sebastian. “And when I heard RotorWay’s number one crackerjack welder was a woman. I figured I’d strike a note for equal opportunity employment.”
Brother Ray hauled the completed Exec helicopter airframe from the factory in Arizona to Los Angeles in “the largest covered trailer U-Haul makes” and set about readying the assembly for final preparation and painting.
The airframe is often the most distinctive part of any aircraft, and the flowing lines of the Exec helicopter are no exception. The welded 4130 chrome-moly frame is a relatively simple, sturdy structure, designed for straightforward building and extreme durability.
Ray Sebastian’s Exec and Sebastian himself will be on display at the Third Annual L.A. Expo Aircraft Show at the Los Angeles Convention Center. Show dates are November 29 and 30 and December 1, 1985. Press media day is at Whiteman Airport on November 27. There will be demonstration flights of the Exec by RotorWay factory personnel.
Photo 1
A few minor brackets and the battery box assembly must be assembled to the airframe before painting. Here, Sebastian clamps the crossover tubes to the Exec helicopter skids (which will be final assembled later), so that the frame and skids are properly aligned and leveled before welding the battery box in place.
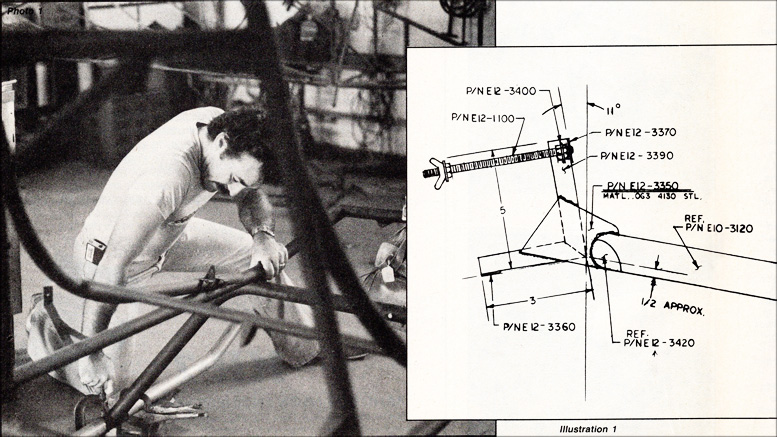
Illustration 1
This detail from one of the planset diagrams shows the 11-degree forward sweep of the battery box brackets. The view is from the side, forward is to the left. The main horizontal tube shown in the drawing is part of the lower airframe. After leveling the frame with a bubble protractor, Sebastian went to a pro for help.
Photo 2
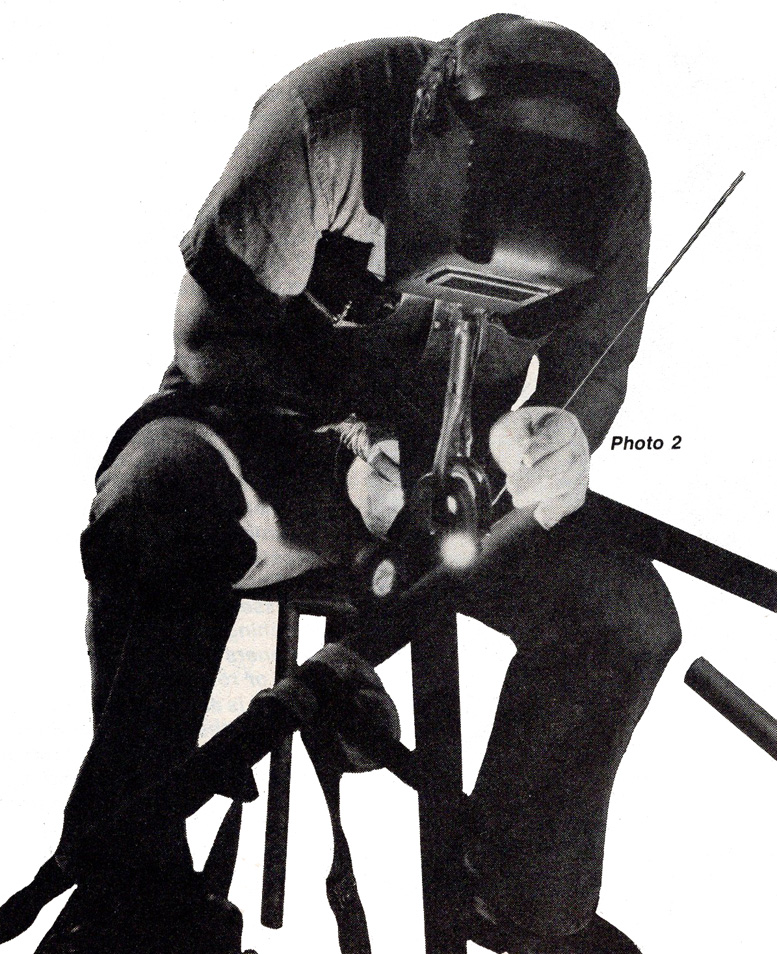
FAA certified airframe welder Bill Hitt of Abel Air at Los Angeles’ Whiteman Airport welds up the Exec helicopter battery box bracket. FAA inspectors encourage farming out professional skills, like welding, if the builder is in doubt of his own ability to do the job properly and safely.
Typical charges for such minor welding work run around $35 per hour. Welder Hitt had the battery box done in 15 minutes. The forward tilt of the box is required to conform with the configuration of the fiberglass fuselage skin.
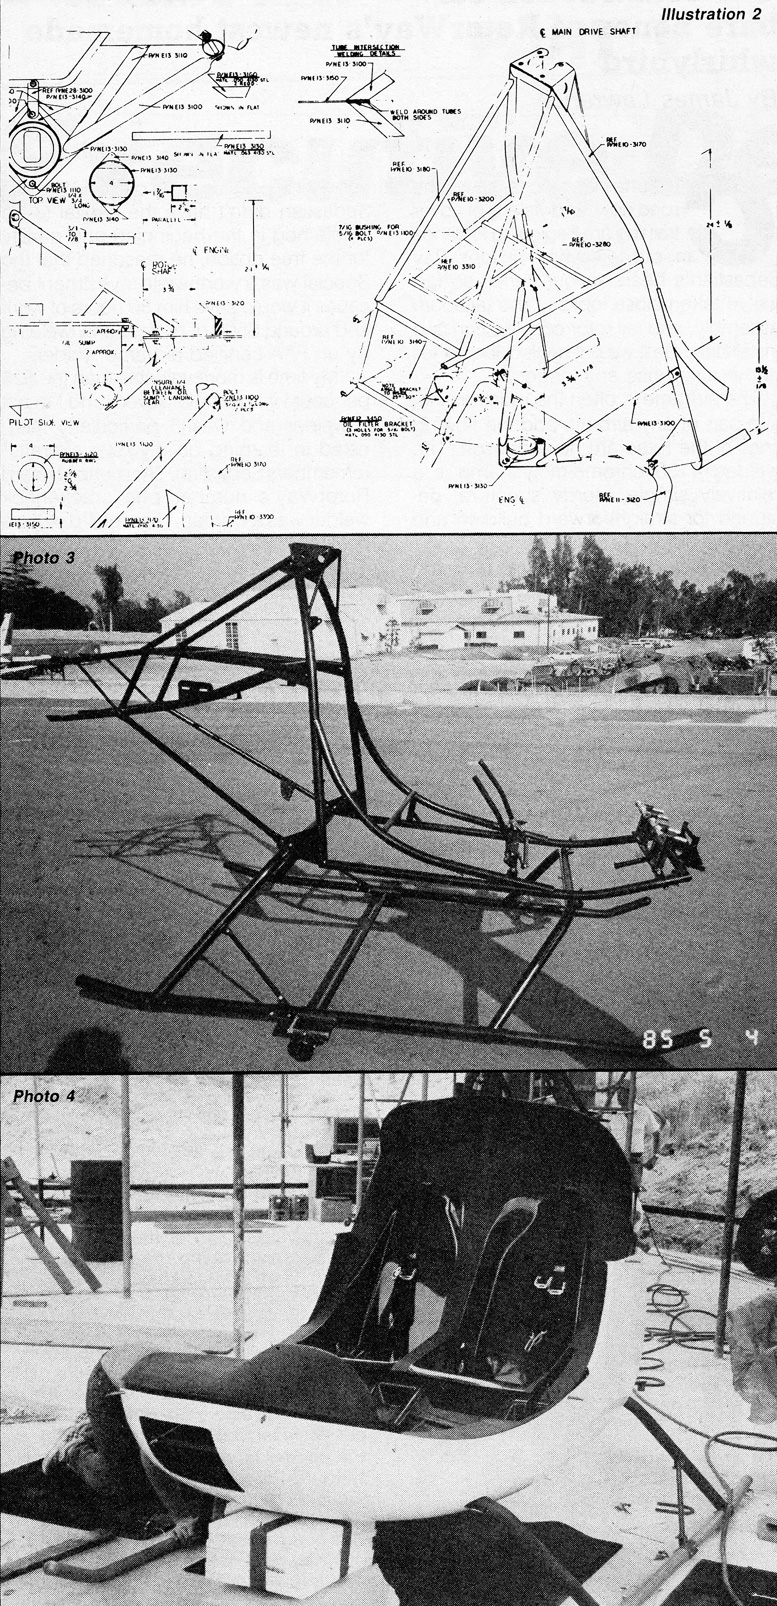
Illustration 2
Planset detail of basic airframe before installation of fuselage skin or flight components. The drive shaft and rotor head will come In at the top of the Airframe. Horizontal “H” tubing is engine
mount frame.
Photo 3
Builder Sebastian became painter Vincent Van Sebastian for the finish work on the Exec helicopter airframe. Armed with a rented sandblaster and a compressor capable of supplying 60 pounds per square inch of pressure to the line, our builder applied a couple hundred pounds of fine grit silica sand (purchased from the local cement yard for $7 1985 price) to completely clean the chrome-moly tubing of rust and dirt.
Do it in a place where excess sand doesn’t pose a problem, or take it home for a couple of year’s supply for kitty’s litter box. The sand-blasting took just two hours. A Badger airbrush commonly used to paint model airplanes was Sebastian’s tool of choice for applying the black two-part epoxy paint.
“When you use the canned propellant,” Sebastian said, “It cools rapidly and pressure drops. So I rotated my three cans of propellant every three or four minutes to keep the job moving along. Putting the cans on a hot stove to warm them is definitely not recommended, by the way,” he said, smiling.
One advantage of using the hobbyist rig in favor of a commercial spray outfit is the savings in paint. Tubing is a fairly small target, perfect for the tighter spray pattern of the air-brush. Also, it’s easier to get into those little corners and comes in handy for the inevitable touch-up. The job was done in about one hour.
Photo 4
The Installation of Exec helicopter Cabin Fuselage, Floor Pan, Etc. instruction sheet offers 62 excellent step-by-step photos detailing the sequence.
From the preface to the sheet: “Attaching the cabin fuselage to the airframe is a relatively straight-forward and simple task if you understand the steps which we have taken in the design of the components to insure their proper alignment. It is important to understand that the body is designed to float on the frame; very little edge trimming of the fiberglass should be necessary to achieve a uniform even fit.”
The advantage of using clecos to preassemble the entire body prior to attaching any of the nut plates or dzus fasteners gives you the opportunity to shift or relocate components somewhat If there is any unacceptable mismatch.”
“Install the bottom tub on the airframe, which requires removal and reassembly of the front landing gear. Hold the seat panel down firmely and force it to the rear as far as possible against the rear airframe tube to which it will also be bolted. Cleco in place.”
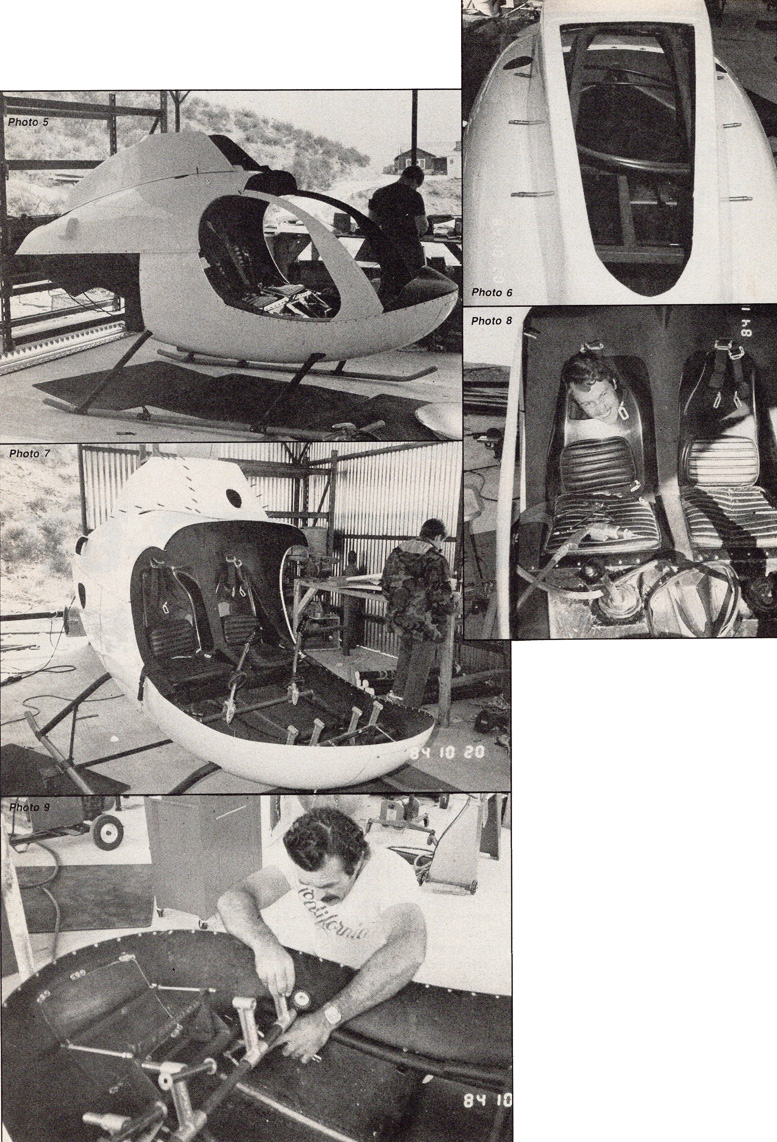
Photo 5
Complete the fuselage panel assemblies as shown, installing and clecoing the lower cowling panels and the doghouse (rotor hub shrouding on top) in place.
Photo 6
Detail of Exec helicopter doghouse from above and behind, looking forward. Note clecos holding the part in place.
Photo 7
The fuselage, sans windscreen, with floor panel, seats, control columns and rotor pedal posts installed.
Photo 8
Look Ma, no body!
A friend of Sebastian tries the “back door” before the passenger seat is finish-installed. Seat cushions and seat back panels have four snaps each.
The back rest should be located at the small of the pilot’s back for long-range comfort.
Photo 9
Sebastian adjusts the Exec helicopter tail rotor pedals and the fuselage is ready for painting.


Be the first to comment on "Rotorway Exec Helicopter Build Part 5"